October 14, 2013

Oatmeal Gnocchi


Welcome back! I know it's been a while since the last post, but I assure you that this post here will make up for it!

What you are looking at is as simple as the title states. Oatmeal prepared in the fashion of gnocchi. Now, before you completely freak out, let me address a few questions you are probably asking yourself right now.

1. What the fuck is Oatmeal Gnocchi? Be patient and I will show you.

2. Are you fucking kidding me? No, I am not.

3. What in the hell would possess you to make Oatmeal Gnocchi? The simple answer is David Chang. The longer answer is I wanted to play with oatmeal.

Question 3 was actually asked to me by a coworker when I told her that I made this. I won't say her name, but I loved how blunt she was about it. :)

In all honesty, turning oatmeal into gnocchi wasn't my initial goal. My goal was to simply play around with an ingredient that was inexpensive and had sort of a bad reputation. If you think about it, most people only see oats in a couple forms, as either a porridge or in cookie form. But how could something so good be held down to just two ways of preparation? It was that line of thinking that had my mind racing in trying to figure out other ways to use oatmeal.

For some reason, I had it in my head to start with using fully cooked oatmeal. And when I say fully cooked, I mean FULLY FUCKING COOKED AND SEASONED, with butter, brown sugar, and all that good shit!

After cooking the oatmeal, I poured it into the food processor and blended the hell out of it until it was as smooth as it could get.

Now, my first experiment was actually oatmeal pancakes. I used a 50/50 ratio of the blended oatmeal and pancake batter. 

The pancakes came out ok at best. You could get the flavor of the oatmeal, but they were a little on the dense side. Here is a pic of the pancakes:

After remembering how David Chang turned ramen into gnocchi, I figured I could give it a try. I started with roughly 1 cup of the cooked oatmeal. I added 2 egg yolks and approximately 1/4 cup flour and mixed until combined. The amount of the flour may vary. I kept adding flour until the mix turned into a goopy-like state. In other words, it should be thick enough to slowly fall off a wooden spoon, like GOOP!

The amount of flour in the picture above is not 1/4 cup. I added more flour after this pic.

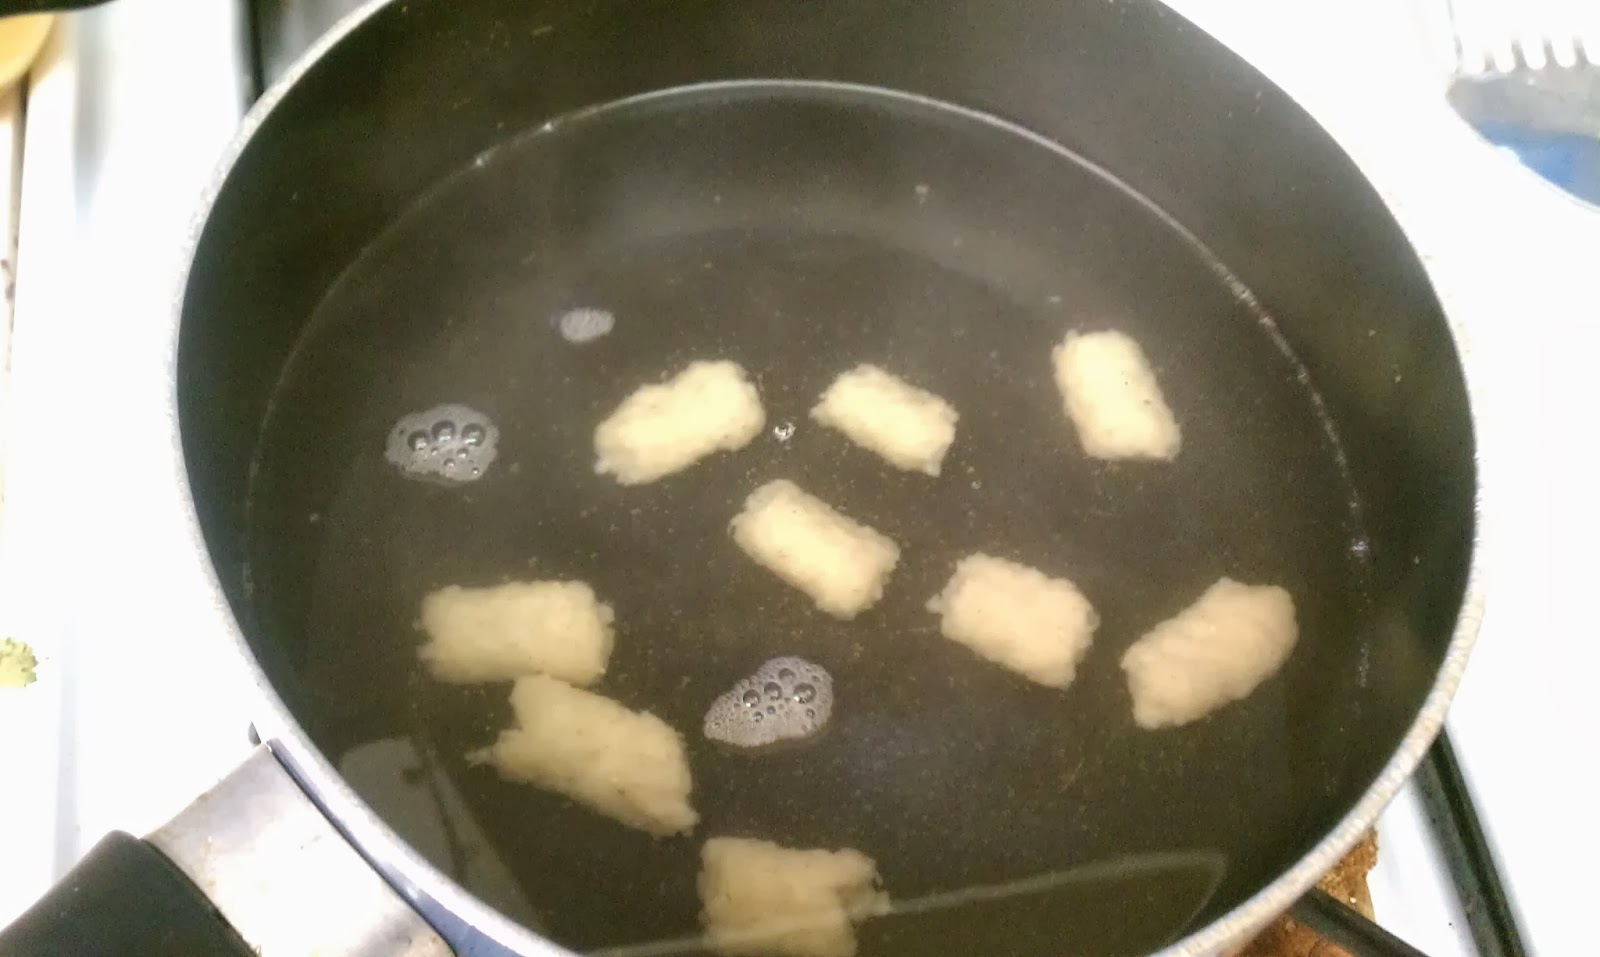
Once combined, I placed the mix in a zip lock bag and let it chill in the fridge for a half hour. When the mix had cooled, I heated a pot of water to a simmer. I then cut off a corner of the zip lock bag and piped in the mix. I used a butter knife to cut the mix into small pieces as it was going into the water.

From here, I cooked the oatmeal like gnocchi. Once they started to float, I cooked them for another 30 seconds and then removed them from the water. I placed the poached gnocchi in a pan with a little vegetable oil to prevent them from sticking.

At this point, I got a saute pan to medium heat. I added a little vegetable oil to the pan and dropped in some of the gnocchi. Once in the pan, I didn't move them around much, to let them develop some color and crunch.

At this point, when the gnocchi were almost done, I dropped in a little butter and brown sugar to give the gnocchi some added sweetness. When all the gnocchi had a nice, sticky glaze, I turned off the heat and removed them from the pan.

I didn't have any crazy ideas for a plate-up, so I just kept things simple. I piled them in the center of plate and drizzled some maple syrup around it. DONE.

There was something really cool about this oatmeal gnocchi. I first tasted them right after I removed them from the pan. They were sticky and sweet, with that tender texture of oatmeal that we all know. Then, as it cooled down, something happened. That sticky and sweet outside began to harden, and created this crispy shell around each gnocchi. They were a little reminiscent of mini french toast sticks, except they were oatmeal. It was really delicious!

Since I still had some gnocchi left over, I figured I would try it without the brown sugar glaze. So, I sauteed the gnocchi on both sides and left it at that. I brushed some blueberry syrup on the plate first. I dusted the gnocchi with powdered sugar on a separate plate before placing them on the plate with the syrup. And that was that.

One more picture, for the road.

Without the brown sugar glaze, they didn't have as much sweetness or the crunchy shell. But, it still had some crunch on each side from the saute. Personally, I liked this approach a little better. I was able to control how much sweetness I wanted with my oatmeal gnocchi. While the stripe on the plate may look nice, I still had a shot glass of syrup on the side to dip my gnocchi in to.

Overall, I felt this oatmeal experiment was a success. I remember telling a coworker that this is the kind of meal you make someone when you are trying to get laid.  It can look beautiful and taste delicious, all the while being cheap and easy to make. Guys, this is the post you want to bookmark!

That's it for this one. I hope you enjoyed it and will give this one a try. If you have any questions or comments, please feel free to drop a line at the bottom of the page.

Take care!

September 16, 2013

Meatballs Over Rice


Hi Everybody! It's time for another wonderful blog post by yours truly. As you can tell by the title of this post and the picture above, it's pretty easy to figure out what this one is all about. The truth is, there is actually more going on behind the scenes than you might believe.

The original title I wanted to use for this post was "Cooking Without Recipes". I was just going to explain how when it comes to hot foods, I usually don't follow recipes and just wing it. I would then list a bunch of tips that help me in the kitchen. Then I remembered that I hate "Tip" blog pages. In my opinion, a lot of Tip pages come off a little preachy. I usually leave a comment on the page like "I've got a tip for you! Go Fuck Yourself!!!"

Plus, I feel like I'm not really good enough to be telling people what they should be doing in the kitchen. The only thing I really suggest is to simply relax and have a little fun with it. If all else fails, just keep it simple.

What I have for you this time around can be enjoyed as a either a light appetizer or a full meal. Just use a smaller portion for the app.

For the rice, I started by sauteing some white onions with yellow and red bell peppers. A little salt and pepper to season.

Sorry for the blurry pics. Anyway, when the veggies cooked down a bit, I added a few tablespoons of Oyster sauce. When it looked like the veggies had soaked up some of that sauce, I added some pre-cooked basmati rice. Stir well and season with a little more salt and pepper. I added cumin as well, to bring a little smokiness to it.

When the rice is almost done, add a couple handfuls of fresh spinach and mix it in. This step should be done right before it hits the plate.

When it comes to the meatballs for this dish, it's really the last part of cooking that is the most important element this time around. Honestly, you can prep the meatballs anyway you like. I kept it pretty simple for the most part. I used ground beef and added Worcestershire sauce, bread crumbs, salt, pepper, hot sauce and five spice powder.

I rounded the meat in to balls and placed them on a baking sheet. The went in to the oven at 375 for about 10-12 minutes.

Now it's time for that last, crucial element with the meatballs. Place some of the meatballs in to a hot pan and pour a little barbecue sauce in the pan. Cook the meatballs in the sauce until the sauce has reduced down a bit and each meatball is well coated.

This time around I used Korean barbecue sauce. For me, the best sauce to use for this is Hoison. The Hoison sauce will reduce and create a sticky, crunchy shell around each meatball. I didn't have any on hand, so I went with the Korean sauce.

From here, all you have to do is plate up.

I added a little cilantro at the end to make it all fancy. Did it work?

And there you have it. There really isn't too much to this dish. Half of it involved left-over rice, and the other half was fuckin' meatballs!

This is the kind of stuff that keeps me interested in cooking. Simple food that can make you smile and fill you up.

Oh yeah, it tasted pretty damn good!

I'm out.

September 4, 2013

Custard Pie


Welcome back to my little corner of the world wide web. What I have for you today is as simple as the name of the dish itself. Custard Pie. And that's exactly what this dessert is. Custard baked in a pie shell.

While the dessert itself is rather easy to prepare, there are a few little tips and tricks you can do to ensure that this dish is the best it can be. Before we get to that, lets start with the basics: The Recipe.

Honestly, there are so many recipes of this dessert online, I feel like I don't even need to post it. Most of the recipes I found were only different by the smallest variation, be it a few ounces of sugar or milk. But, I don't think it's fair to the reader to not know what I used to get the results I achieved. So, here it goes!

Custard Pie

1                    9 inch pie shell

2 1/4 cups     Milk
1/2                Vanilla bean, split and seeded

2                   Eggs
2                   Egg yolks
3/4 cup         Sugar
                     Freshly grated Nutmeg

If you don't have any fresh vanilla bean, you can add a couple teaspoons of good vanilla extract in place of the bean.

This first step is really for using the vanilla bean. If you don't have the bean, skip this step.

Start by slicing your vanilla bean in half and scraping out the seeds with your knife. Place the pod and seeds in a pot with the milk and bring it to a simmer. When you see the milk start to steam, turn the heat off. Stir for a second to mix the vanilla seeds around, then let it rest for at least 15 minutes. Doing this will create a stronger vanilla flavor.

Now it's time to pre-bake the pie shell. First, spray your pie tin with non-stick spray. I used a French tart shell because I like the appearance a little better. 

Once sprayed, Lay down your pie dough and make sure to press it in all the nooks and crannies. After you trim the edges, get a fork and punch a bunch of holes in the bottom to keep it from rising too much. Bake at 350 degrees for about 10 minutes. You want it to be a light brown. Remember, it's going back in the oven later.

Now, the rules of baking say you need to weigh down the center with beans or pellets. I didn't do that because I was being lazy. When it came out of the oven, it did bubble in the center, but I just pushed it down with my hand while it was still hot. It turned out just fine.

With the shell done, it's time to make the filling. Crack your eggs and egg yolks and mix well. Stir in your sugar and mix until combined. 

Take out the vanilla pod from the milk and stir the milk into the egg mixture slowly. Once that is mixed, you are almost done.

Pour the mix into the cooked pie shell and bake.  I sprinkled fresh nutmeg over the top before baking, but this can be done after baking. 

Most recipes will call for you to bake this at 350. I baked mine at 325 to be on the safe side. 

After about 28 minutes or so, the pie was done. To check to see if it's done, give the tray a couple taps. It will jiggle slightly, but stop quickly. If it needs more time, it will jiggle, but look watery.

If you look at the picture above, you can see it's a bit wavy at the bottom of the pie. When I took it out, it had puffed up like a balloon  in that section. I don't know why it did that, but it didn't make much of a difference in the end.

After letting the pie cool and making some whipped cream, it was time to eat.

A little more fresh nutmeg on top and this baby was ready to go.

This thing tasted great! The nutmeg and vanilla shined through. The texture was creamy, while the pie crust was still crisp. Pre-baking the shell really helps.

As good as it was, the real treat didn't come until the next morning. I woke up and got a small slice to start my day. This pie tasted even better cold! 

Well, that's really about. I know this one might have seemed a tad long winded, but it's really easy to make. If you have any questions, please feel free to leave a comment and I will get back to you.

Oh yeah, Custard Pie is also the name of a pretty good Led Zeppelin song.


I'm out.